Showing posts with label Christmas. Show all posts

Baby's First Christmas

Honestly, I'm just glad I survived the holidays this year! With the baby, Zach traveling for residency interviews, starting work again... it was a lot jam packed into December. But, we made it! And we had some fun doing it. We love our family time and it was even better with the little one. 

Em did so awesome seeing Santa. We went to The Landing and luckily there was absolutely no one in line for Santa! That was one of the things I was dreading about going to see Santa... waiting in line for over an hour does not sound at all appealing to me with a four month old. But Santa was SO nice. He was smitten with Emerson, too. Since there was no one behind us in line, he took his time holding her after the pictures were taken. He said he had four kids in college and missed having little ones around. So cute! 

Our favorite little present.

She mastered her "Hungry Tiger" face. I love it. She does it all. the. time. I think that's how she tries to laugh, but no sound comes out!

Someone got a little spoiled.

Me and my little Mini Me.

One of our weekly pics... I just love this one!
Christmas baby selfie!
Hanging out with GG!
Conquering the art of present-opening.

We continued our annual tradition of driving around to look at Christmas lights and opening our stocking gifts (and ornaments) to each other. I love this tradition! It's our first Christmas tradition that was between just the two of us when we got married. I love our families, but I also love this time we get just the two of us to exchange our small gifts and ornaments. This year we brought Em along (of course, although she was asleep the whole time), got our coffee ready and headed over to Ballard to the Olympic Manor neighborhood. We'd gone there a few years ago and it was awesome - the whole neighborhood is lit up! After driving around and giving our critiques, we pulled over and exchanged gifts - I got Zach a cell phone charger dock and a coffee mug with pictures of Em (from Shutterfly - awesome!) and he got me two silicone baking mats and a sweet coffee tumbler. Em and I made our ornaments this year (two actually) - salt cookie ornaments with her hand and foot prints (he loved). He got me one with boots, one big pair and one small pair that says "like mother like daughter." I love it!


We picked out Em's first Christmas tree from this awesome farm - Zach cut it down while Em and I supervised. As you can tell, she wasn't very enthused.

We had a great Christmas filled with lots of card playing, food, laughs and family time (with a little bit of rough sleeping nights thrown in). Overall, it was an awesome Christmas!

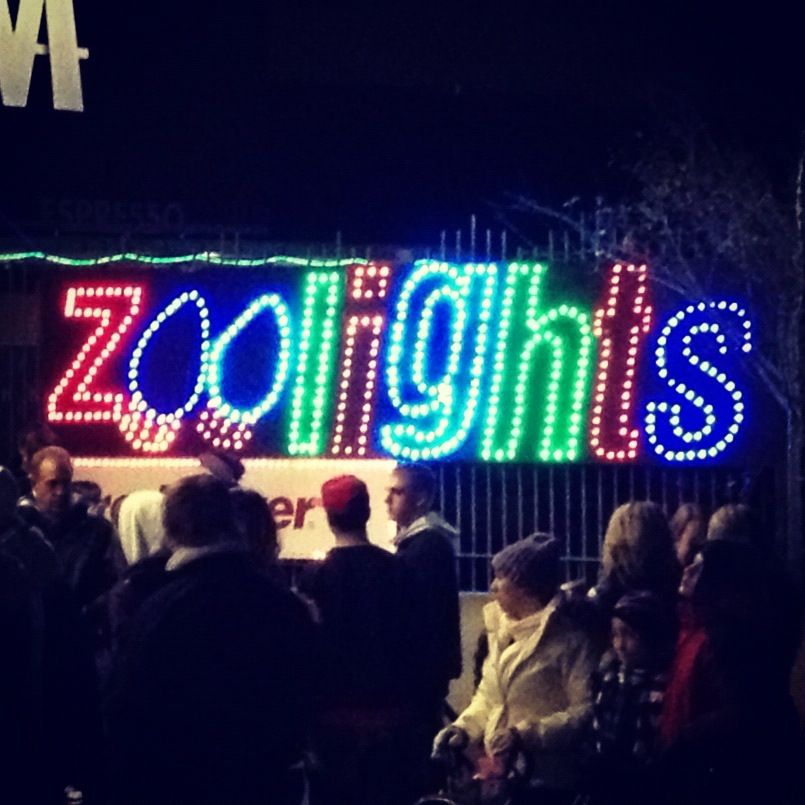
Zoolights

Hi there! How was your weekend? I hope it was filled with lots of Christmas lights, hot chocolate, warm fires and maybe some shopping (I definitely prefer shopping of the online variety this year). We had such a fun weekend. I took Friday off to catch up on life and use up some of my vacation days. It was much needed, especially this time of year when we are crazy busy, but in a good way. 

Saturday we had our friends, Kim and Jake, over for dinner and then went down to Tacoma to Zoolights. None of us had been before and it was so much fun! They sell discounted tickets online and at Fred Meyer, which I would highly recommend since the line was really long when we got there. Also, there's not a lot of parking. We got in the park about 8 and stayed until 9:15 even though the park closed at 9 (there were still lots of people there). 


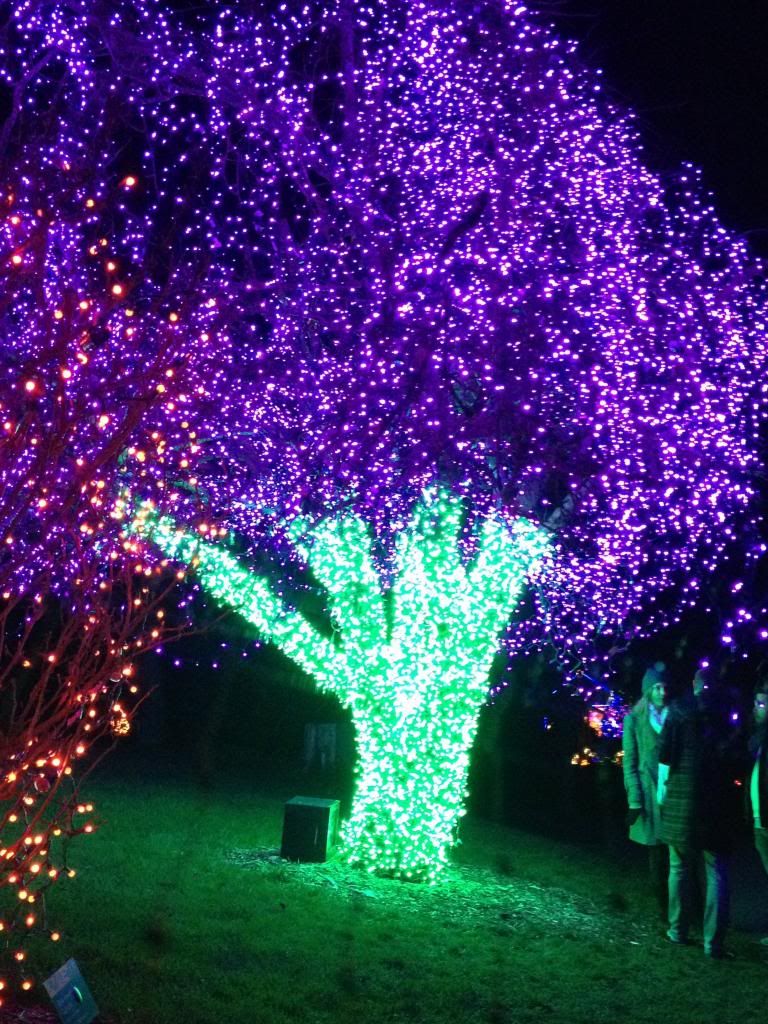
I was in love with this green and purple tree. When we walked by, we even saw a couple that had just gotten engaged by the tree! So sweet.


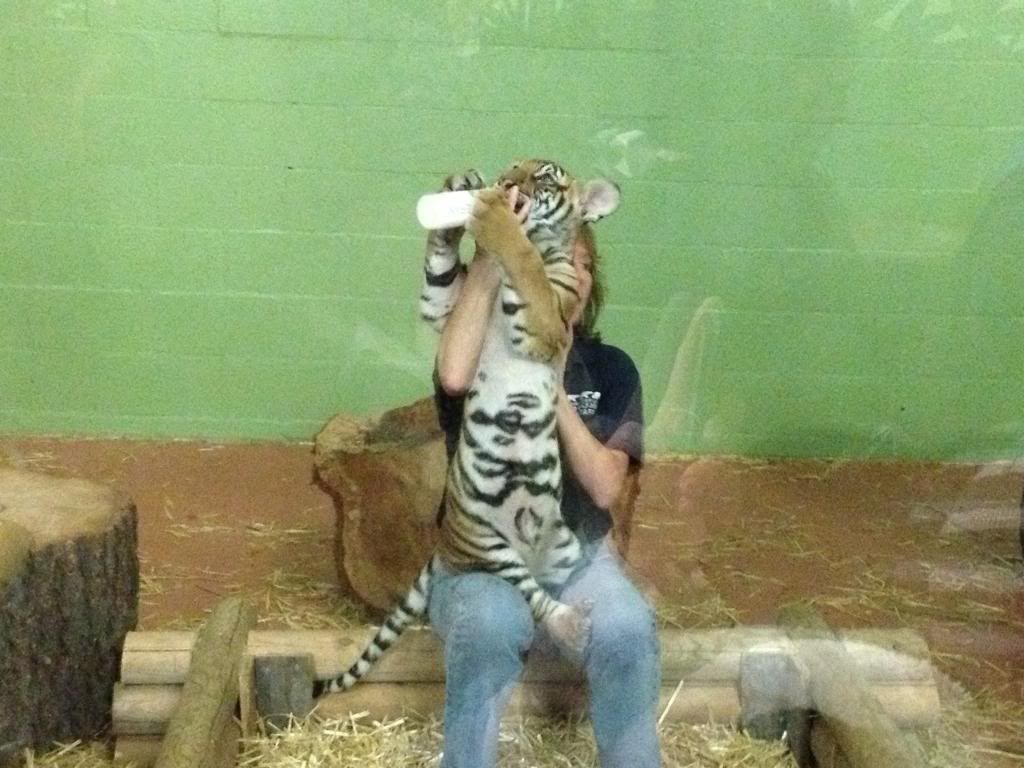
The best part was the baby tigers! There were two baby tigers and right as we walked up the zookeeper went in their cage to feed them! When we saw them, Zach and I both thought they were just like Brody. Haha. Huge, gangly, clumsy, rambunctious. They were so cute! 


We had such a great time! We would highly recommend going to check out Zoolights. Hot chocolate, Christmas music blasting throughout. It was pretty busy, but you could definitely just walk around at your own pace. The only bad part was the penguins... if you know me, you know why... and they smell horrible! 

Go check out Zoolights (here's a link to buy them online).

Fudge

Over the holidays I did a bit of baking, but it was most of the good old favorites like sugar cookies, crinkle cookies, and spritz cookies (gluten free!). I did make some fudge though. It's my bro's favorite holiday treat, so I had wanted to make some for him. Who am I kidding, it's one of my favorites too (and so addicting)! 

I've had trouble in the past when making fudge. It gets stuck in the dish and then it becomes really hard to cut pieces out and then Megan gets mad because all she wants is a little piece of chocolate-y goodness. Yes, apparently I sometimes talk about myself in the third person. Sooooo... when I was at IKEA back in November sometime I picked up a variety pack of cupcake liners in their cute Scandinavian prints (I loved all their Christmas stuff this year and went a little crazy!). The liners came in three sizes and I thought the mini-cupcake size was perfect for little bite-size balls of fudge. No sticking to the dish and no trouble cutting a piece here!

Anyways, short story long, here's my Fudge recipe:

// No baking required! //

Ingredients
3 cups semisweet chocolate chips
1 14 ounce can sweetened condensed milk
1/4 cup butter

1. Heat all ingredients in a pan on the stove until completely melted (you can also heat it up in the microwave).
2. Pour into an 8 x 8 glass pan and refrigerate until hardened (I think if you put some tin foil down before you pour in the fudge batter it will be easier to get out of the pan too). 
3. OR, if you want you can use a cookie scoop and put the fudge batter in little cupcake liners for the perfect bite-size fudge balls like I did!

They were delicious! What kind of holiday or New Year's treats did you make this year?

Have a Very Merry Christmas!

We hope you have a great Christmas filled with laughter, love and lots of family. Merry Christmas from the Kane's!

(source)

Ugly Sweaters

This year we had our First Annual Ugly Sweater Christmas Party. It was actually the first one I'd been to (ugly sweater party, not Christmas party) so that meant the hubby and I hit up Goodwill and Value Village on a hunt for the most fabulous ugly Christmas sweater.

Unfortunately, most of the ugly Christmas sweaters were gone (we're a little behind), BUT there was no shortage of regular ugly sweaters!

Here's mine. I call it "kitties on my kitties." Haha. I crack myself up (and I don't even like cats).


And here's the hubby's Kwanzaa sweater (It was actually a women's XXXL complete with shoulder pads). Mmmmmmmhmmmmm.


Here's a pic of the whole group (future doctors of America!). And yes, most of the hubby's classmates are girls.


Fun, right?! Did you guys attend any ugly sweater parties? Any other fun themed Christmas parties? I hope you all had a festive and fun Christmas party season!

DIY: Pom Poms

I guess I'm just in a crafty mood these days. Christmas will do that to you. This year I'm kinda obsessed with pom poms. They are just so cute! And since we have a lot of extra yarn laying around, it just makes sense that we use up some of our leftovers (saving some bones, woot!). I'm using them as ornaments, to wrap presents, and as other random decoration around the house. 

I found this tutorial last week (also one of my new favorite blog reads), and realized how easy it was to make the little pom poms. First, grab some yarn in a pretty color (or an ugly color, if that's what you're in to). I chose some pink, white, and gray for the ornaments I made.


Then start wrapping the yarn around 3 or 4 of your fingers (I think 3 is the best size). You can wrap as much or as little as you want, but the bigger, the better in my opinion. That way you get some nice fat little poms. 


Cut off an extra piece of yarn (leave enough length to tie a knot and if you are making an ornament, enough to hang on the tree). Notice the handle of the scissors... Buster got to them (of course).


Next, take your scissors and start cutting the little loops on either side. Once you're done cutting, you can shape the pom how you want to make it more even.


If it's still looking a little scruffy, you can start trimming so it's all round and perfect and pom-my. 


I gave these to my two friends, Kim and Shan, for our ornament exchange this year. Like I said, kind of  obsessed. 


Have you made any ornaments this year? Obsessed with poms like me? :)

Happy Weekend!


What are you guys up to this weekend? We have my work Christmas party tonight, and tomorrow we are heading to Leavenworth for the day! Leavenworth is this cute little Bavarian town nestled in the Cascades and luckily, is just a couple hours' drive from us. We're taking the BBoy and I'm totally excited. Like little-kid-waiting-in-line-to-meet-Santa excited. 

Have a great weekend! 

P.S. Only 16 days til Christmas!!!

(find images here and here)

DIY: Anthropologie Inspired Snow Globes


I saw the snow globes at Anthropologie this year and loved them (but not for $18 a pop). True, they are not real snow globes (no water needed!), but they still get the job done. Look at how cute they are! Here's my inspiration (from here).


What you'll need:
Mason jar
Christmas trees - various sizes (I bought a variety pack of the Lemax Christmas village trees)
Fake snow
Glue gun


First, take off the lid of the mason jar and pick your tree. 


Glue the tree to the lid of the jar - make sure that you are gluing it to the inside of the lid!


Let it dry for a while. Luckily, hot glue dries pretty fast. 


Fill up your jar with fake snow. You don't need much (trust me on this one)...


Put the lid back together and stuff as much snow as you can in there (so you're still able to close and twist on the lid with the jar). And yes, I just switched jar sizes on you mid-tutorial. And I'm going to switch again (this was a learn-as-you-go project).


Now here's the tricky part (it might get messy). Flip the lid with the trees into the jar. See? I switched on you again. Can you keep up? :) Screw on the top and there you have it! No water needed and you have your own little festive snow globe. Note: Don't put as much snow in the jar as I did below - this was the only picture I could find of this part.


Aren't they charming? I love how they turned out. Classic and simple.


And these would be perfect as gifts! My plan is to make a third smaller one if I can find a tiny little mason jar. And another cute tree. 

Here's the cost breakdown:

Mason Jars - about $1-3 (depending on the size)
Fake snow - $3.49 for a bag
Trees - $20 for a bag full (on sale 60% off though, so only $10ish!)
Total per jar - about $3-3.50! Booyah! 

Are you making any Christmas gifts this year? Or doing any cute Christmas crafts? I'd love to see what you guys have done!
Related Posts Plugin for WordPress, Blogger...